
 Svenska
Cart
Your cart is empty, but doesn't have to be..



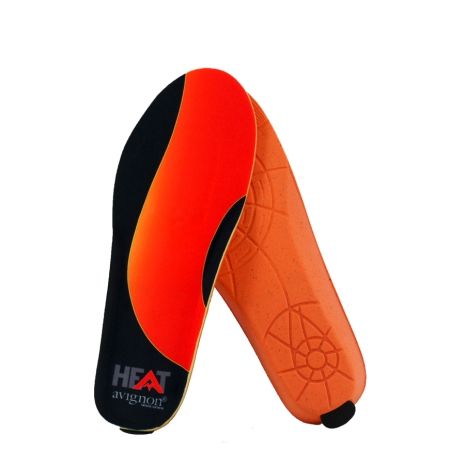
RECHARGEABLE HEATED INSOLES
Complete heating kit.
– 3 heat levels. 40, 50 and 60 degrees.
– Shock-absorbing and comfortable insole in polyester, foam and PU.
– 3.7V 1800 mAh batteries integrated in the insole.
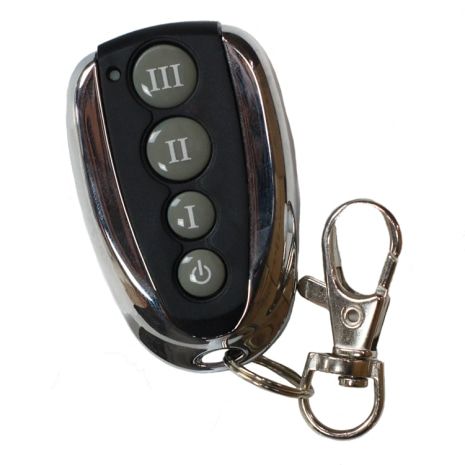
– Controlled with a simple remote control that fits in the pocket.
– Charging kit with micro USB and wall plug.
– Heating system on the underside of the forefoot.
– Cut at the front for the right fit.
INSTRUCTIONS
To charge your insoles, connect the enclosed micro-USB at the back of the insole and the plug in the wall socket. The insoles are charging when they indicate flashing red, change to orange and are fully charged when it flashes green.
When the insole is fully charged, press the ON button (small black button) at the back of each insole so that they can receive signals from the remote control.
The insole is now in standby mode and is controlled with the remote control. In standby mode the insole's LED light indicates how much battery remains. Flashing green light 67-100 percent battery life, orange light 34-66 percent and red light 0-33 percent. If the insole lies still, the light goes out and it enters power-saving mode. When the insole is set in motion it is activated again. As long as the ON button is on, the insole can always receive signals, even when it has stopped flashing. With a fully charged battery the insole can stay in standby mode for 27 days before the battery is discharged.
THE INSOLE HAS 3 HEAT SETTINGS
1. Green light, output 40 degrees. Approx. 6 hours of use.
2. Orange light, output 50 degrees. Approx. 5 hours of use.
3. Red light, output 60 degrees. Approx. 3 hours of use.
Output and usage time depend on conditions. Maximum heat output is achieved when the insole is switched on before use, as a lower temperature is then enough to keep the foot warm. If the foot is already cold and needs warming, a higher output is used and the heating time is therefore shortened.
To save battery, switch off the insoles if you are not going to use them. Or charge the insoles so they switch off automatically after charging. The insoles must always be activated, with the small black button at the back, after they have been charged, in order to receive signals from the remote control.
HEAT
– The insole has an ergonomic structure with good shock absorption.
– Comfortable insole in polyester, foam and PU.
– Integrated heating system on the underside of the fore- foot. Thin, super-fine heating panels strategically placed for maximum heat distribution.
– The heating coils are well sealed to withstand wear and moisture.
– 3.7V 1800 mAh batteries installed in the insole.
– The heating system is controlled with a simple remote control that fits in the pocket.
– 3 heat levels for optimal comfort in all weather conditions.
– 3 LED indicators on the back of the insole show how much charge remains/has been reached, during use and while charging.
CARE AND USE
1. When the insole is not in use, switch off with the ON/OFF button at the back of the insole.
2. The insole can be wiped with a damp cloth. Not machine washable or other mechanical cleaning.
3. Lay flat to dry. Not in a tumble dryer, on a radiator or in a drying cabinet.
4. Make sure the insole is completely dry before switching the heat on again.
5. To get maximum battery time for heating, warm up the insole before use. Keeping warm, and not heating up when you are already cold, gives longer heating time.
6. At minus 10-15 degrees, the MEDIUM/orange 50% heat level is recommended. At lower temperatures use HIGH/red 100% for about 5 minutes for proper warming. Then return to LOW/green or MEDIUM/orange, depending on what feels good. This is to avoid causing overheating and/or discomfort.
STORAGE AND CHARGING
1. It is important that the insoles keep at least 25% charge when not in use. When not in use it is best to charge them fully. This ensures lifespan and quality.
2. Storage at normal room temperature.
Your cart is empty, but doesn't have to be..